Drupal Commerce is an open source eCommerce platform that natively extends Drupal to sell any type of product to anyone in the world. This includes sales of products that are customized at the point of sale, like an engraved piece of jewelry or an event registration. It also includes sales to B2B customers and others who require a configure, price, quote (CPQ) workflow to review and authorize a purchase.
This post explains the feature set at a high level with an example configuration.
Drupal's data architecture
Supporting this feature set is Drupal's data architecture, which lets the Commerce modules define new data types for entities like products, orders, order items, and more. These are defined with sets of base fields, and they can be extended further with custom fields as needed. (Read more about this subject at Drupalize.Me.)
For example, one of our merchants sells scuba equipment. While product variations include price and SKU base fields by default, this merchant added custom fields for the specifications of different models. This structured product information is then rendered to PDPs, displayed in product comparison charts, and exposed as facets in search interfaces to help customers find the right product.
When you add custom fields to an entity, you don't just get to determine where and how they are displayed but also the form interface(s) used to input field data. You can control the number of values a field supports and the type of form element used to set those values (e.g., checkboxes, select list, free tagging textfield, etc.). For data types that support multiple form modes, like order items, you can also determine the context in which a particular field will be editable by a user.
One such form mode defined by the cart module for order items is Add to cart.
Add to Cart forms
Tying this feature set together is this principal innovation of Drupal Commerce: an Add to Cart form is simply a different mode of order item creation form. Therefore, any field can be added to any order item type and made part of a product's Add to Cart form with whatever form element the product requires. These configuration or customization fields can be optional or mandatory, support one or more values, use a basic or complex widget, and even appear or disappear based on other form values.
The minor caveat in Commerce Core is that the order item type used for any given Add to Cart form is derived from the product variation type. This means if you need different sets of fields for different forms, by default you must use a different product variation type and order item type for each form. That may not be desirable in every circumstance, especially for use cases with large numbers of fields and complex logic. In those cases, we typically recommend sites incorporate custom code to refine the fields presented to the customer from a single order item type.
Example: Custom jewelry
One of our merchants is a large jewelry chain that permits customers in certain circumstances to customize jewelry. A typical use case would be the addition of an engraving to the inside of a ring or rear of a pendant. If we wanted to accomplish this in Drupal Commerce with no code, we would implement the following configuration.
1. Define an order item type.
A product added to a cart is represented as an order item on a cart order. In this case, only some of our products will be customizable, so we will create a new order item type to be used specifically for those products' Add to Cart forms.
Navigate to Commerce > Configuration > Orders > Order item types and add a new one labeled Custom jewelry. Its purchasable entity type should be product variation, and its order type can be the default order type or any custom type you have created.
2. Add product customization fields to it.
Next, we must add the fields to the order item type to store customizations. These can be of any field type Drupal supports, such as validated email address fields, image uploads, and more. In our case, it will be a plain text field for an engraving.
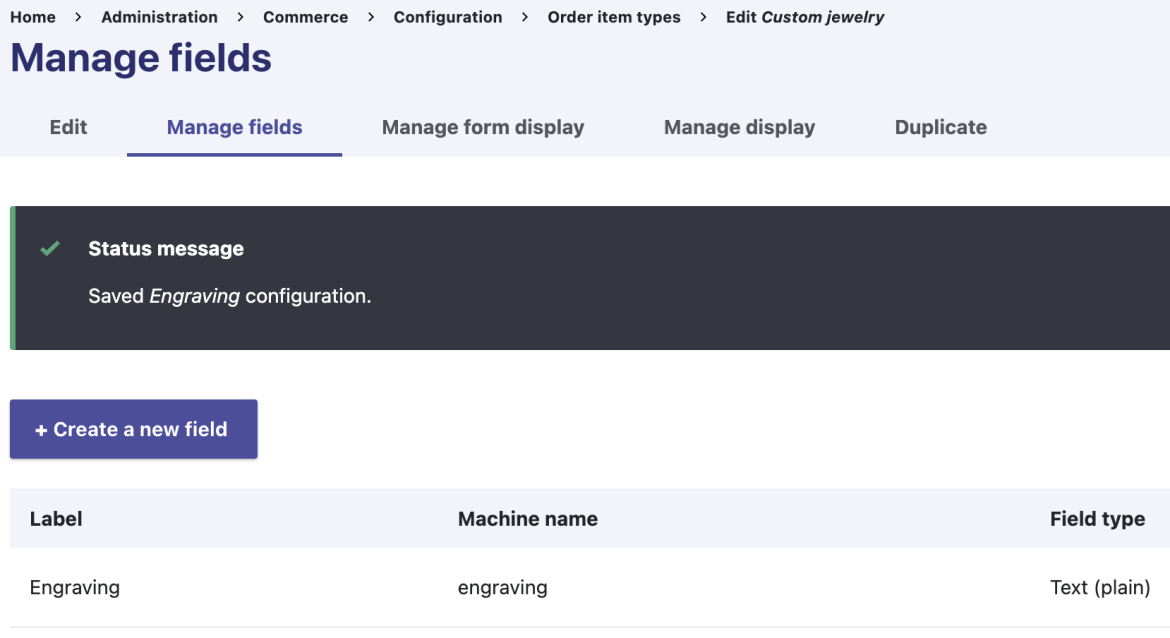
Navigate to the Manage fields interface for your new order item type and add the desired field(s). For this tutorial, we used a plain text field with a maximum length of 25 characters and supplied help text so the customer will understand the limitation. We also did not require a value for this field, meaning a customer can choose whether or not to add an engraving.
3. Include those fields on its Add to Cart form.
These new fields will not be included in your Add to Cart forms by default. They must be enabled and placed on the form relative to the other fields, which include product variation selection and quantity inputs by default.
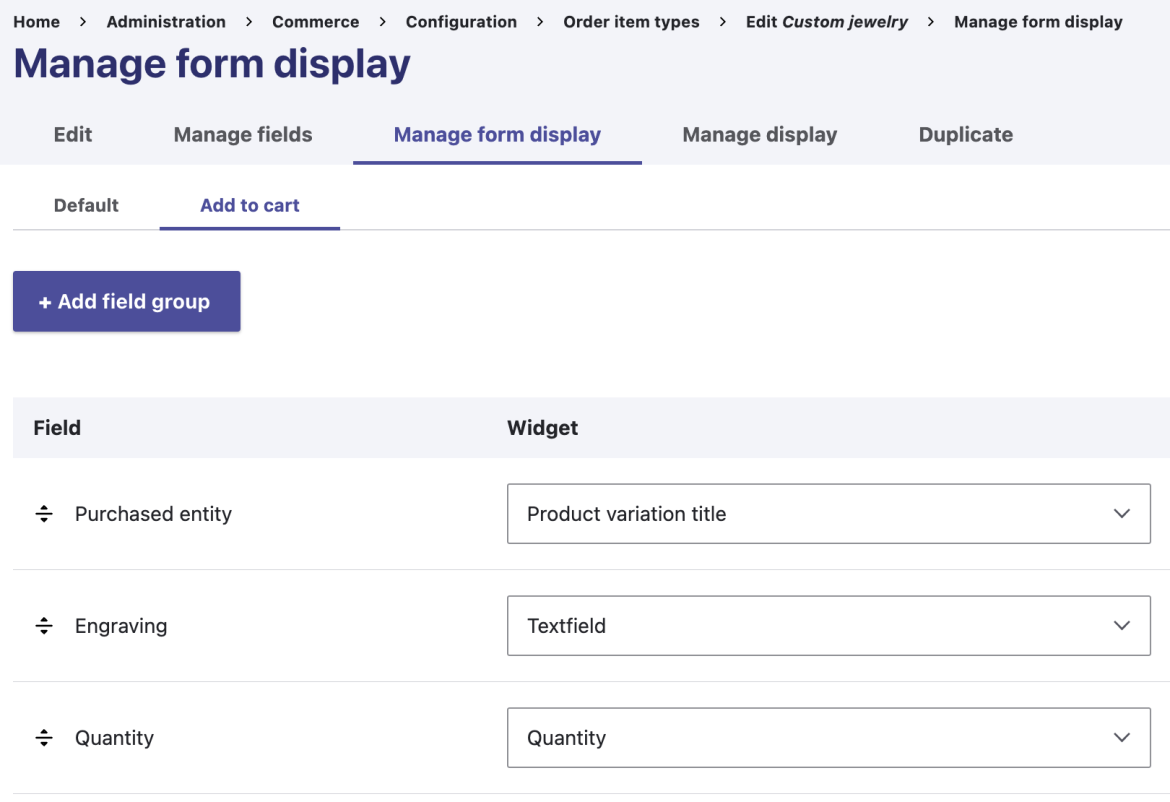
Navigate to the Add to cart form tab of your order item type's Manage form display interface. You will see your new field(s) in the Disabled section and can drag them up to enable them. In our case, we have placed the engraving text field just above the quantity text field that appears on our Add to Cart forms.
4. Define a product and product variation type.
For this example, we'll assume that the jeweler's products fall into one of two broad categories: those than can be customized and those that cannot. We will disregard products that might require attribute selection, such as the size of a ring or type of metal, and focus for now just on an engraving customization.
Navigate to Commerce > Configuration > Products > Product types and add a new one labeled Custom jewelry. The description entered here will help product managers know when to select this type of product versus any other you have defined. We have made ours assuming there will be a single variation per piece, and we are choosing to create a new product variation type to represent those.
(Refer to the products documentation to learn more about how Drupal Commerce differentiates products from product variations.)
5. Connect the variation type to the order item type.
When Drupal Commerce prepares a PDP, it renders the Add to Cart form based on the order item type that will represent the current product variation in the cart. Our last step here is to connect our new types together.
Clicking the product variation type link from the product types listing will navigate to its edit form. Doing so for our new Custom jewelry product variation type, we can select the Custom jewelry order item type and save.
6. Create a product!
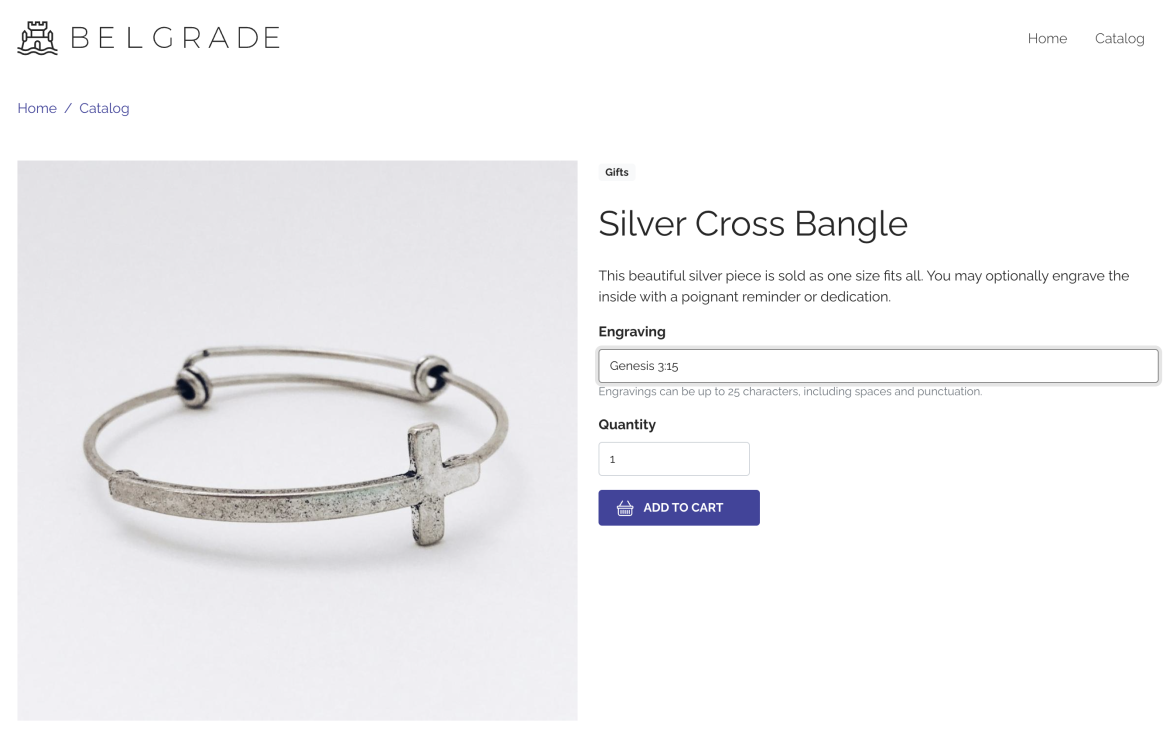
To complete our configuration, we copied fields and display settings to the new product type from the other product types. We typically work against Commerce Kickstart locally, so the screenshots below will reflect its standard product configuration.
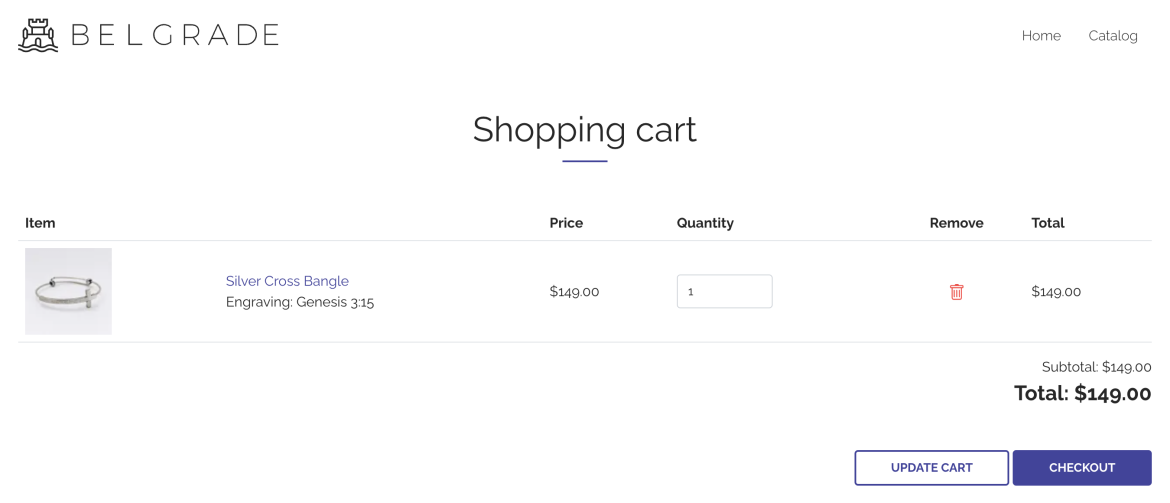
As you can see, the Engraving field appears as expected and will be validated according to our field configuration. When the customer submits the Add to Cart form, the engraving value will be saved to the order item and can be displayed anywhere the order item is rendered.
We edited the Cart form View to add the engraving to the display. It could be similarly added to the shopping cart block, order view page, receipt email, or anywhere else the information needs to be displayed. This will permit you to access or view the data in your configuration or customization fields anywhere you need to fulfill the order.
Obviously, your particular configuration will need to be tailored to your use case, but hopefully this example made clear just how flexible this system is to support almost any case you can imagine.
(Note: while this covers the "Configure" part of CPQ, getting configuration into structured data is just the first step. Pricing will then be dependent on other parts of Drupal Commerce, like its promotions and price list systems, along with custom code you write to further process orders prior to quoting. Topic for another day!)




Add new comment